Add Images
This section covers the adding of prep images to kitchens.
Select the required customer and kitchen from the dropdown lists.
When the kitchen is selected then the list of available and current images for the customer will be displayed.
To create products and images in bulk from an import file, check the Bulk Entry From File checkbox.

This section lists the images that are available to be added to the selected kitchen.
By default, the list will show the images that have NOT already been added to the kitchen.
To show the images that have already been added to the kitchen, uncheck the Show Unassigned Images checkbox.
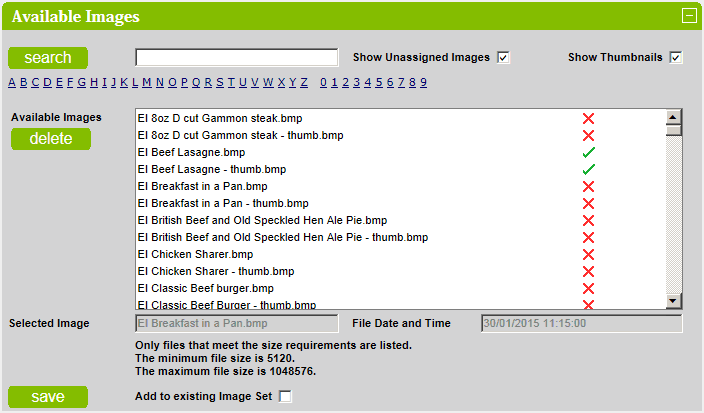
To mark an image for selection, click on the  icon - it will change to
  .
.
When only one image is selected then click on the delete button to delete the image.
To add all selected images to the selected kitchen, click on the save button.
The image will automatically assigned the next available image number.
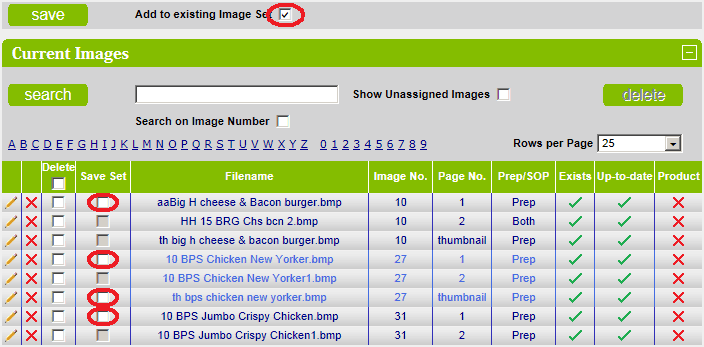
To add an image to an existing image set, click on the Add to existing Image Set checkbox and select the
image set from the list of assigned images.
The image will automatically assigned the next available page number.
An image can be added multiple times to multiple kitchens.
To view a thumbnail of any image, just click on the image name.
The thumbnail will appear to the left of the list.
To prevent thumbnails being displayed, uncheck the Show Thumbnails checkbox.
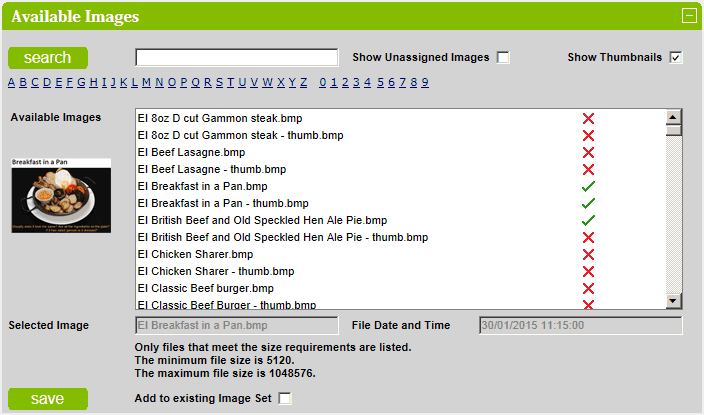
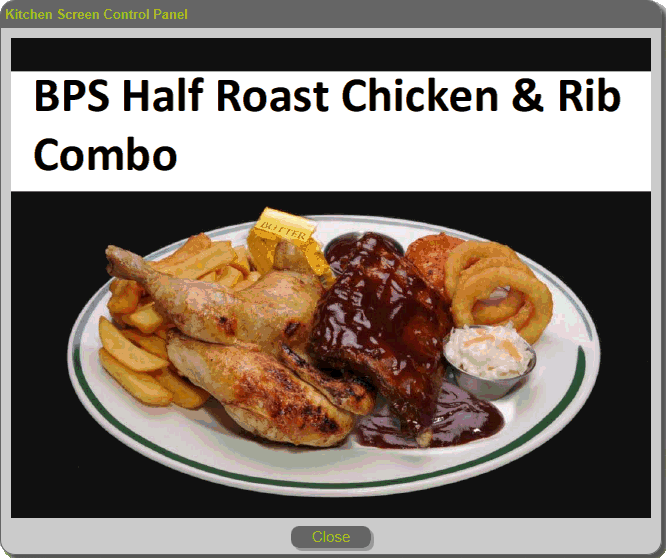
To view a large version of any image click on its thumbnail.
The large version will appear in an overlaid image window.
Click on the close button to close the image window.
This section displays a list of all the images that are currently added to the kitchen.
Click on a search bar letter/number to display images that start with that letter/number.
Enter search text and click on the search button to display images that contain the search text in their filename.
To edit the image, click on the  icon next to the description.
The File Name is the original name of the file that was added.
The Page No. denotes the display order on the Logwood Kitchen Screen System.
If the Page No. says thumbnail then the thumbnail image is displayed on the kitchen screen when the item is
displayed.
The page number can be changed by editing the image.
The Prep/SOP value denotes whether the image is a prep image, a SOP (standard operating procedure) image or
both.
When Exists shows a then the image exists.
When Exists shows a then for some reason the image no longer exists.
When Up-to-date shows a then the date of the file on the server and the date of the file that was used when the
image was added are the same.
When Up-to-date shows a then there is a discrepancy between the date of the file on the server and the date of
the file that was used when the image was added. Most likely a new version of the file has been uploaded.
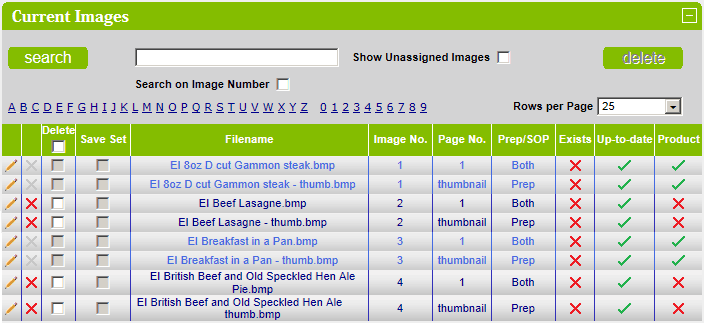
When Product shows a then the image is linked to at least one product.
When Product shows a then the image is NOT linked to any products.
By default all images are listed. Check the Show Unassigned Images checkbox to only list images that have products.

Delete an Existing Image
To delete an actual unassigned image, select it and click on the delete button.
NOTE: The delete button will only be enabled when one and only one unassigned image is selected.
To delete an image from the kitchen (but not the actual image), click on the  icon next to the description.
To delete multiple images from the kitchen (but not the actual images), check the checkbox next to the filename and
then click on the delete icon.
Deleting a image from the kitchen will delete the image from the database and therefore the references to the kitchen
and products.
NOTE: It is only possible to delete and image from the kitchen when it has no linked products.
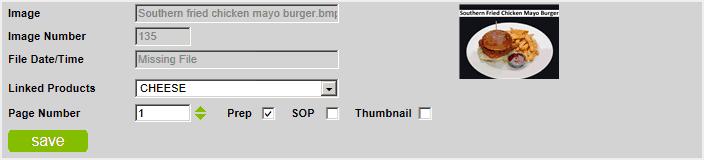
Editing an Image
To edit the image, click on the icon next to the description.
A thumbnail of the image will be automatically displayed.
Click on the thumbnail to view a large version of the image.
Modify details as required and click on the save button to save the changes.
Any linked products will be listed in the Linked Products dropdown listbox.
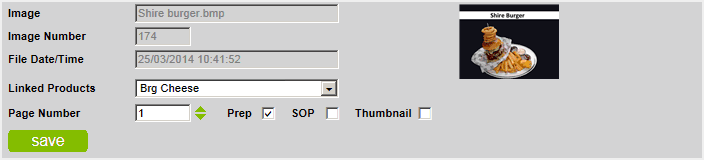
If the are no linked products the None will be displayed in the Linked Products dropdown listbox.
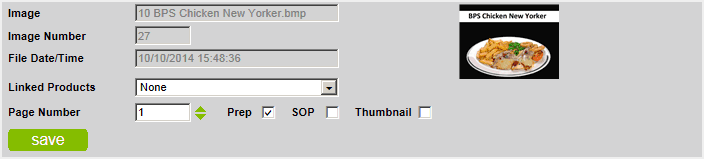
Saved File Date/Time is displayed when there is a date/time discrepancy.
To update the image with the new date, click on the save button.
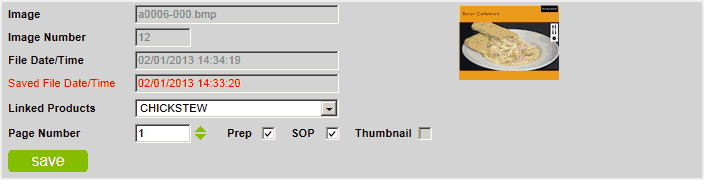
If the file no longer exists then Missing File is shown in the File Date/Time field.
Bulk Entry
Check the Bulk Entry From File checkbox to create products and images in bulk from an import file.
Select the import file from the Bulk Entry File dropdown listbox and click the upload button.

All available products will be displayed.
To add a product, check the Add checkbox on the grid row.
Click the save button to save the products and images.
