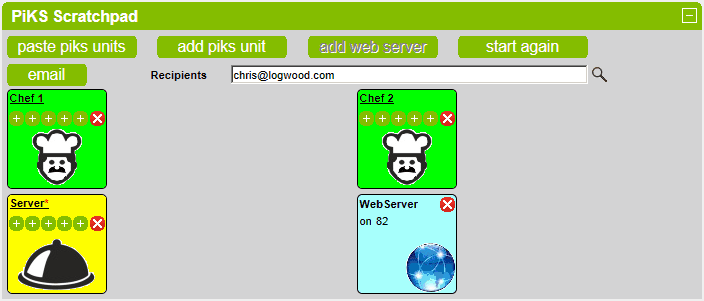
PiKS Scratchpad
This section covers the processes required to configure PiKS units using the scratchpad.
The Scratchpad operates as a blank canvas for creating pi.def (and pitables.def).
PiKS units can be created from an existing pi.def or entered manually.
The files can be emailed to required recipients.
At any time, click the start again to clear everything and start again.

Paste PiKS Units
Click the paste piks units button to paste and save an existing pi.def (This would usually have been copied
clicking on the  button in the setup of another site):
Paste the configuration into the box.
Click the save button to add the PiKS units.
Click the clear button to clear the box.
Click the cancel to abort.
Add a PiKS Unit
Click the add piks unit button to add a new PiKS unit:
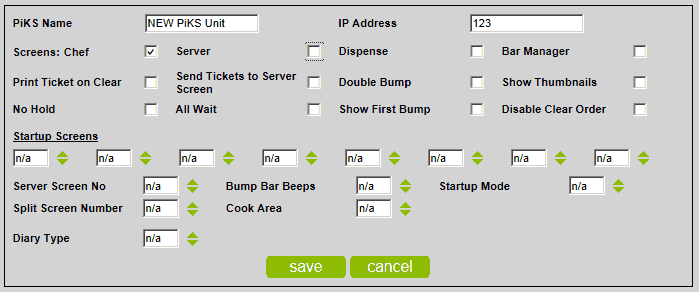
The PiKS Name and the IP Address fields are compulsory.
The IP Address field is the IP address of the PiKS unit.
The IP address must be in the format <n>.<n>.<n>.<n> OR <n> where <n> is a number between 0 and 255.
A Screen Type must be selected - one of Chef, Server, Dispense or Bar Manager must be checked.
By default Chef is checked.
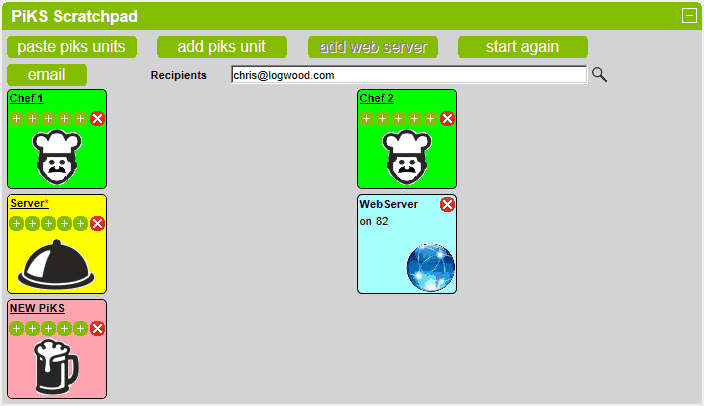
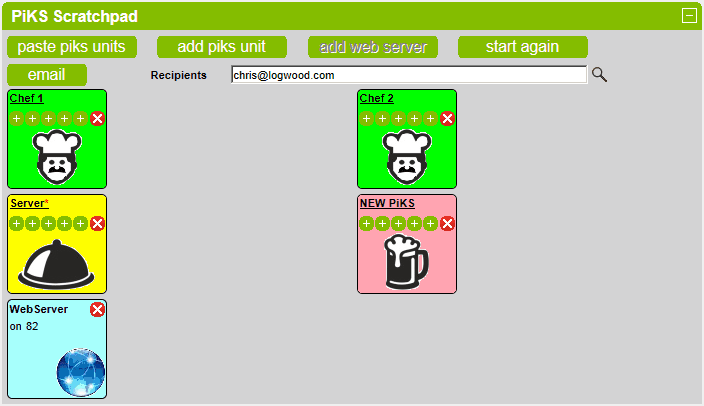
The new PiKS unit will be added to the list:
Add a Web Server
Each Site is permitted one Web Server.
To add a Web Server, click the add web server button.
The Web Server runs on an already configured PiKS unit and therefore requires the IP address of an existing PiKS unit.
Available IP addresses are displayed in a list - select the required IP address from the list.
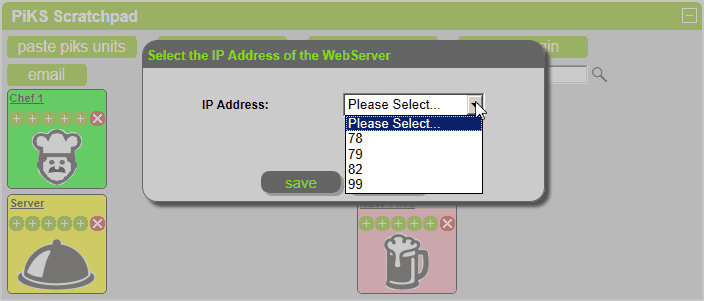
Click the save button to add the Web Server or cancel to abort.
The new Web Server will be added to the list:
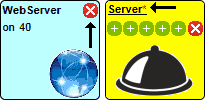
A Web Server cannot be modified. It can only be deleted by clicking on the  button and re-added by clicking on
the add web server button.
If a Web Server is present then the PiKS unit that it runs on is denoted by a small red asterisk next to the PiKS unit
name - see the PiKS unit named Server above.
View / Update PiKS Unit Details
Click on the PiKS Name to view the PiKS unit details.
Click on the first  button to view the General Settings.
Click on the second button to view the Startup Screens.
Click on the third button to view the Other Settings 1.
Click on the fourth button to view the Other Settings 2.
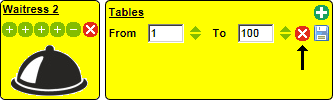
Click on the fifth button to view the Tables.
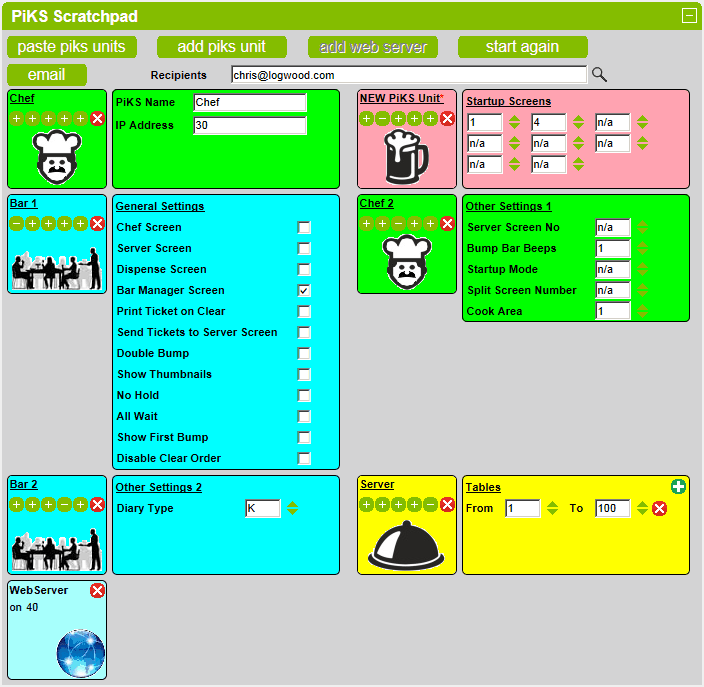
Use the text boxes, spinners and checkboxes to make changes where appropriate to any PiKS unit.
It is not possible to change the IP address of a PiKS unit that has a Web Server.
The Web Server must be deleted first.
To add a new table range on the Tables tab, click on the  button, select the range and click on the click on the
To delete an existing table range on the Tables tab, click on the button next to the range to be deleted.
Delete a PiKS Unit
To delete a PiKS unit, click the button next to the PiKS unit that is to be deleted.
It is not possible to delete a PiKS unit that has a Web Server. The Web Server must be deleted first.

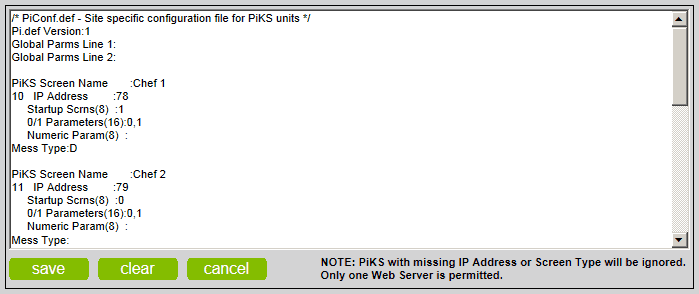
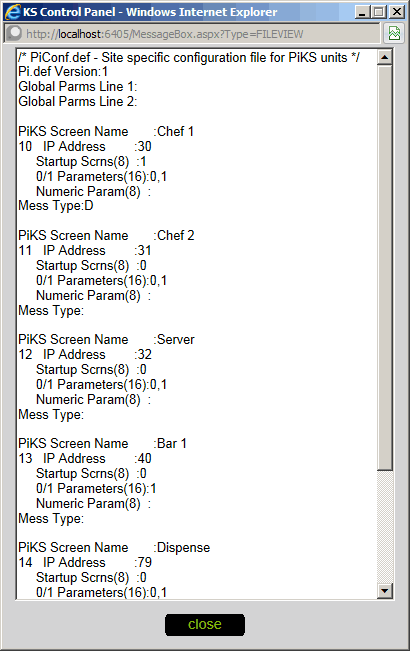
View Config File
To view the setup as a text file (for cut and paste), click on the button next to the email recipients list.
The contents will be displayed in a new window.
Email PiKS Configuration Files
To email the the current configuration files, click on the email button.
By default, the recipient is the email address of the current user.